Health & Fitness
Quiltophobics – Just DO it – Part 2
For those of you who are still not convinced that you can make a beautiful quilt out of even a simple color scheme, read on!!!
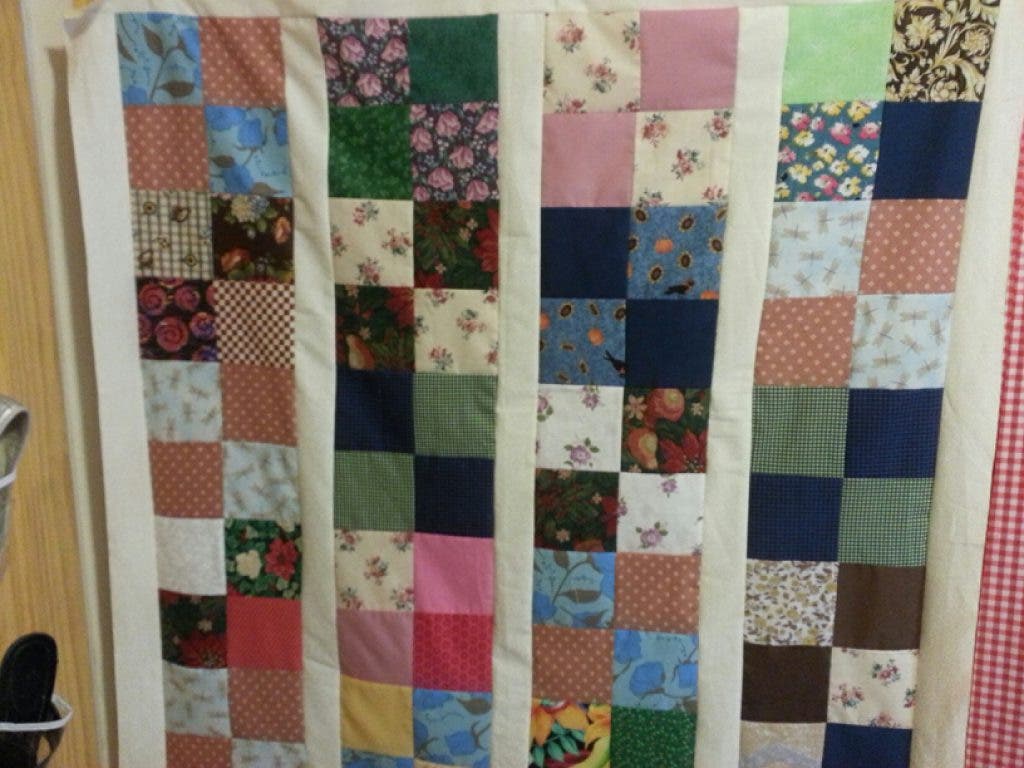
For those of you who are still not convinced that you can make a beautiful quilt out of even a simple color scheme, here is a picture of one I made for Project Linus out of scraps sent to me by a fellow quilter. The quilt is a small (50” x 50”) quilt but can be made larger by adding either more rows or more columns. It took perhaps a week to piece together. Here is a link to directions for making a basic 4 patch quilt:
I vetted it to be sure the instructions were clear (you would be surprised at how many instructions are much more complicated than they need to be!).
Basic 4 patch
Find out what's happening in North Branfordwith free, real-time updates from Patch.
Materials:
- Rotary cutter
- Rotary mat
- Omnigrid ruler (6” x 24” is the simplest)
OR
Find out what's happening in North Branfordwith free, real-time updates from Patch.
- Fabric shears (be sure they are SHARP)
- A straight ruler, preferably metal (the wood ones warp)
- A sharp pencil
For an approximate 60” x 60” lap quilt, you will need to cut 50 squares of color A and 50 squares of color B. This will give you (25) 4 patch blocks. A block is nothing more than 4 squares sewn together – 2 of Color A and 2 of color B. Each square is 6.5”.
You will also need sashing in a white on white or beige on beige tone – there will be 3 strips for the quilt and more for the borders as you can see from the picture.
Here is a link to an awesome online calculator tool by Quilter’s Paradise that will calculate the yardage for each color, as well as for backing, batting and binding.
http://www.quiltersparadiseesc.com/Calculators.php
The best way to ensure that your quilt top goes together easily is to be sure your square measurements are as accurate as you can get them. Before you start cutting your squares, be sure your fabric is ‘squared up’ – that just means that you need to cut off the end to be sure its straight. Most fabric is cut unevenly off the bolt.
Once you have your fabric end straight and even, cut 6.5 inch strips across the width of the fabric. For 6.5 inch squares, you should get about 6 squares per strip. You will need 9 strips of each color.
Take each strip and cut crosswise into 6.5 inch squares.
You may want to cut your sashing as well. You will need to cut 2.5 inch wide strips by width of fabric. You will need 60” strips but the width of fabric is only 42” so you will need to piece 2 strips together. You will need to cut 6 strips for the sashing ( this will make 4 sashing strips).
For the borders, you will need to cut (6) 4.5” strips by the width of fabric. Again, you will need 60” to 72” strips but the width of fabric is only 42” so you will need to piece 2 strips together (this will make the 4 borders).
OK now for the fun part. Sew a square of color A to a square of color B. Make sure you put right sides together. Your seam allowance needs to be ¼ inch. Some sewing machines have a ¼ inch foot. You can also check your existing foot to see what the ¼ inch is. Use a 3 x 5 index card, place under the foot, and drop the needle on one of the lines. See where the right edge of the foot is in relation to the next line. Index card spaces are exactly ¼ inch, so you may be able to move your needle to the right or left. If you can’t, then, using the index card as your guide, lay a piece of masking tape on the machine to line up with the index card line. The edge of the fabric should follow the left edge of the masking tape.
If you are off a bit that’s OK – just be sure you are CONSISTENT. If you want to use the right side of your foot as a guide, just make sure the raw edge of the fabric is always under the right edge of your foot.
After you sew your seam, press towards Color A (or towards the darker fabric). Do not open the seams to press and make sure that you always press in the same direction. You will see why…
Make another 2 patch following the above.
Take your 2 patch blocks. Put right sides together. Make sure that Color A is opposite Color B. You will now need to line your seams up. This is why pressing to one side is important – you can ‘slide’ the seams together so that the pressed seams butt together and look like an open book. Yes, this is calling ‘booking’. Pin on either side of the seam so that it doesn’t move. Sew the 2 patch blocks together. Make sure you don’t run over your pins!!!! This now becomes your 4 patch block.
Make 25 of the blocks (note that the picture is only 20 blocks – its quilt for Project Linus).
You will now sew your blocks into rows, using the same slide technique as above. Make 5 rows of 5 blocks.
Now take your 2.5” sashing strips. Sew one sashing strip to the right side of a row. Do this for 4 rows. Leave the fifth row – that will have a border attached to it.
Now take the second row/sashing strip and sew to the right side of the first row/sashing strip (refer to the picture). Repeat until you have the top sewn together. Note that the first and fifth rows will not have sashing on their respective left and right sides.
Sew a border strip to the first row on the left side. Sew a border strip to the fifth row on the right side. Sew a border strip to the top and bottom of the quilt top.
Your quilt top is now finished and you are ready to bat and back it. This will be in Part 3, so you have time to create your quilt top!


